
Luxury Car Paint Correction Process for Flawless Finish
- optyxautostudio
- Feb 10
- 8 min read


Every luxury car owner in Spokane wants their vehicle to look flawless and retain its value for years to come. Paint imperfections like swirl marks, scratches, and oxidation often stand in the way of that perfect showroom shine. By focusing on precision paint assessment and professional decontamination, you can unlock hidden brilliance in your vehicle’s finish and safeguard your investment. Discover how rigorous paint correction elevates your car’s aesthetics and guarantees the highest standard of automotive beauty.
Table of Contents
Quick Summary
Key Insight | Explanation |
1. Thoroughly Inspect Paint | Assess paint condition using bright lighting to identify imperfections that may require correction. |
2. Use Proper Cleaning Techniques | Employ a two-bucket wash method to avoid scratches and ensure a clean surface for paint correction. |
3. Choose Appropriate Polishing Methods | Start with less aggressive polishing techniques and work up to more intensive methods to avoid damage. |
4. Enhance Gloss Effectively | Use ultrafine polishing pads and compounds to achieve a high-gloss finish after correcting defects. |
5. Conduct Comprehensive Final Inspection | Evaluate the paint finish in various lighting conditions to ensure it meets high standards of perfection. |
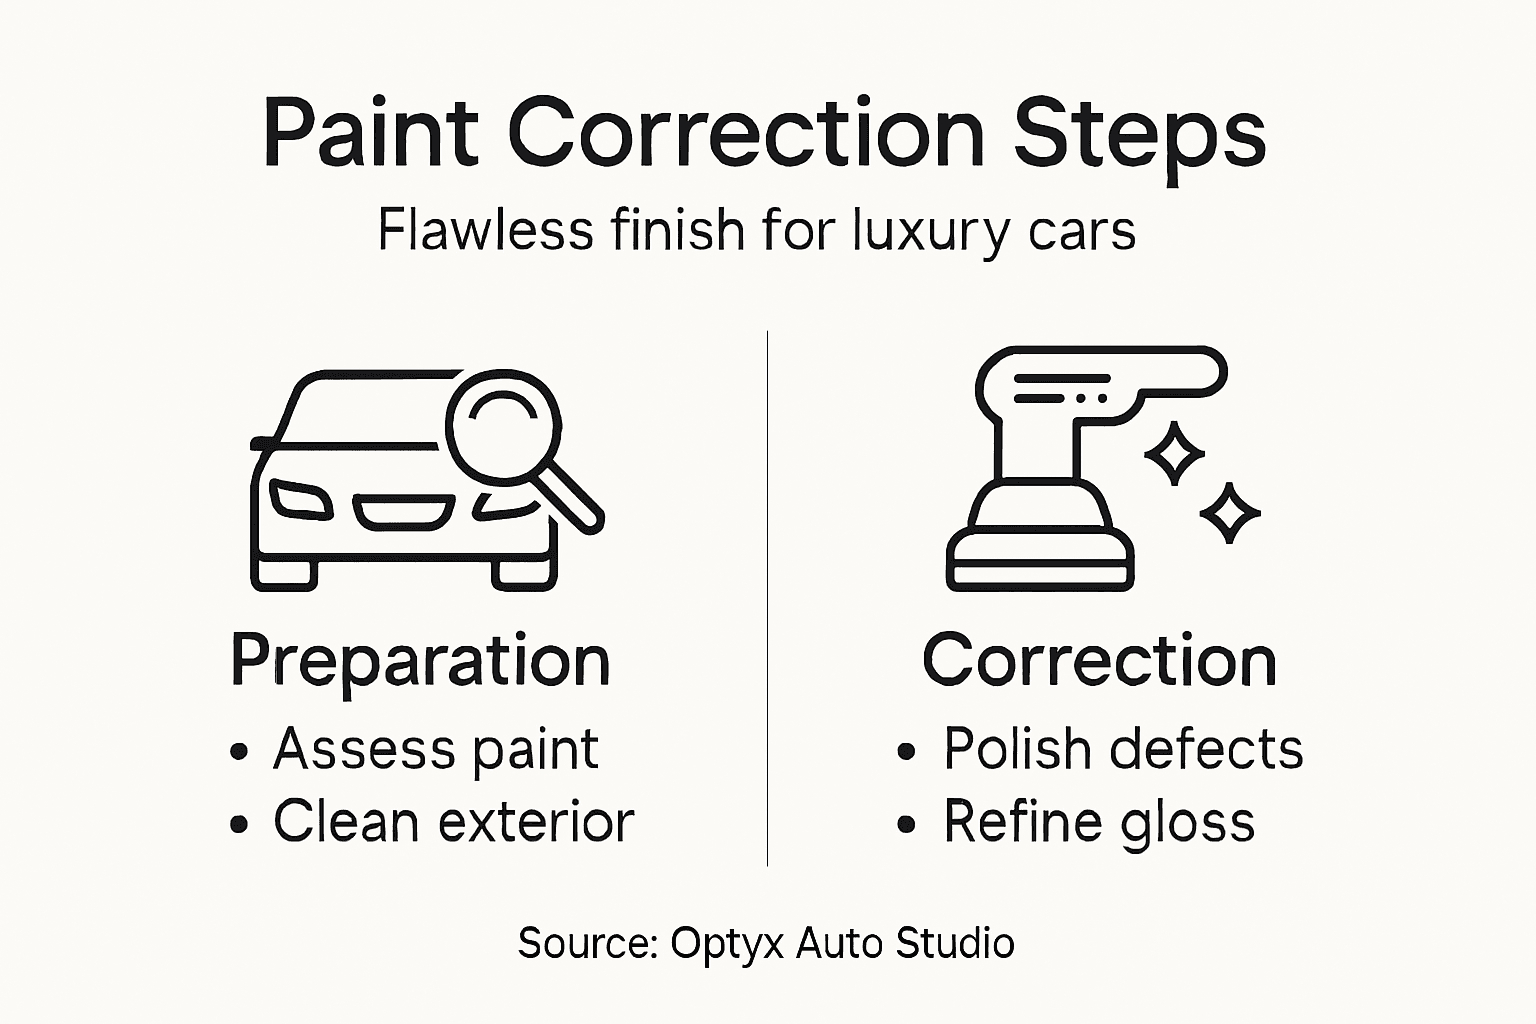
Step 1: Assess paint condition and identify imperfections
Properly assessing your luxury vehicle’s paint condition is the critical first step in achieving a flawless finish. This foundational stage determines the specific correction techniques and level of intervention needed to restore your car’s pristine appearance.
Begin by thoroughly cleaning the vehicle’s surface using a high-quality automotive wash solution to remove any loose contaminants. After washing, carefully dry the car using a microfiber towel and inspect the paint under bright, direct lighting - preferably natural daylight or professional detailing lights. Advanced automotive coating analysis techniques reveal that proper illumination exposes imperfections invisible to the naked eye.
Key paint imperfections to identify include:
Swirl marks from improper washing techniques
Oxidation and fading
Scratches ranging from light surface marks to deeper clearcoat damage
Etching from bird droppings or water spots
Hologram effects caused by machine polishing
Use a specialized paint thickness gauge to measure the clearcoat depth, which helps determine how aggressively you can polish without risking damage. Professional detailers recommend the following assessment method:
Here’s a comparison of common vehicle paint imperfections and their typical causes:
Imperfection Type | Common Cause | Impact on Appearance |
Swirl marks | Improper washing or drying | Dulls shine, visible circles |
Oxidation | Sunlight and weather exposure | Faded, chalky paint |
Scratches | Contact with objects or debris | Lines or grooves in clearcoat |
Etching | Bird droppings, water spots | Surface pits and stains |
Hologram effects | Incorrect machine polishing | Irregular reflection patterns |
Clean the entire surface thoroughly
Inspect under bright, direct light
Use a paint thickness gauge
Document each imperfection’s location and severity
Photograph problem areas for reference
Paint correction is a precision process that requires careful evaluation before any correction work begins.
Pro tip: Always start paint correction assessments in a controlled environment with consistent, bright lighting to ensure you don’t miss subtle imperfections.
Step 2: Clean and decontaminate the vehicle exterior
Cleaning and decontaminating your vehicle’s exterior is a crucial preparation step for achieving a flawless paint correction finish. This process removes embedded contaminants that could interfere with subsequent polishing and protection techniques.
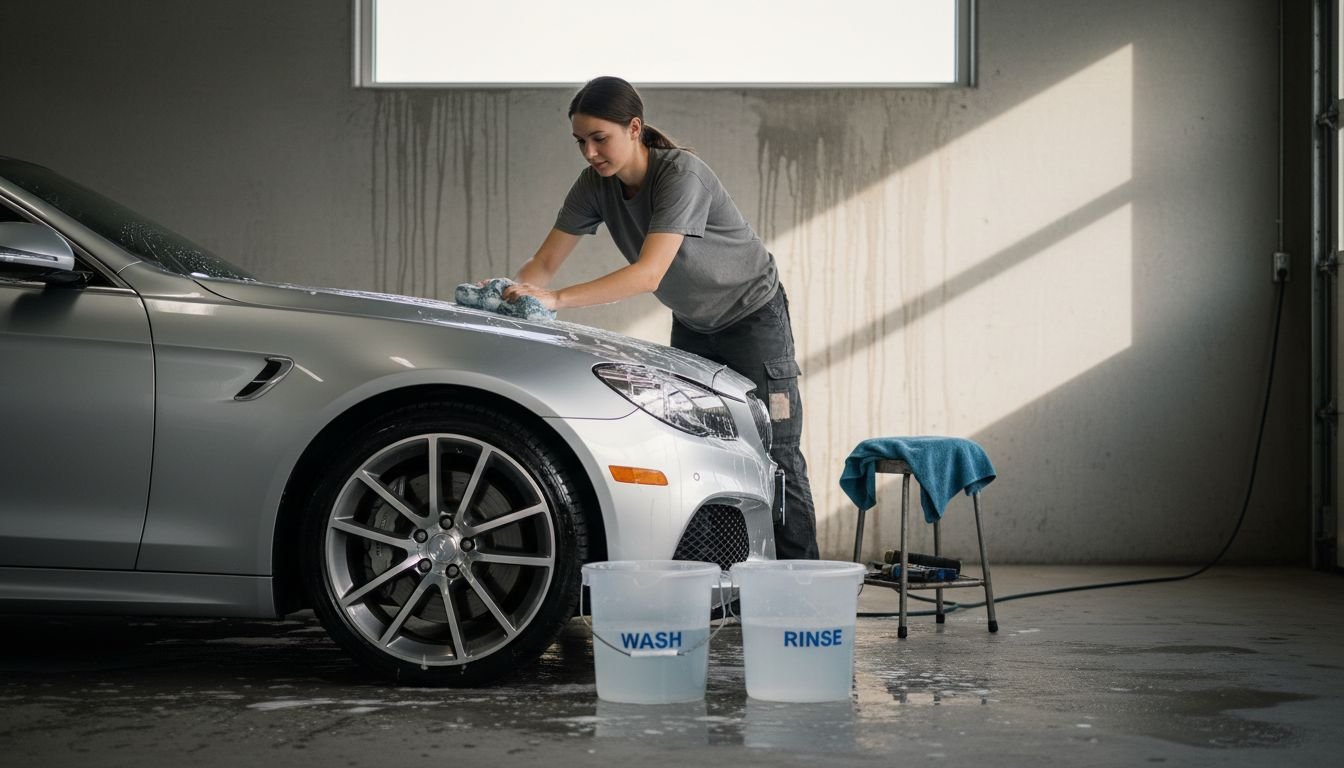
Vehicle decontamination processes require systematic and thorough approaches to ensure complete surface preparation. Begin with a two-bucket washing method using high-quality automotive soap designed to safely lift and remove dirt without scratching the paint. Use microfiber wash mitts and work from top to bottom, ensuring each section receives careful attention.
Key decontamination steps include:
Prerinsing to remove loose dirt and debris
Two-bucket washing technique with grit guards
Clay bar treatment to remove bonded surface contaminants
Chemical decontamination using specialized automotive solutions
Final rinse with filtered or soft water
Professional detailers recommend the following decontamination sequence:
Prerinsing with low-pressure water
Apply pH-neutral car wash soap
Wash using microfiber mitt
Rinse thoroughly
Perform clay bar treatment
Apply iron removal chemical
Final rinse and dry
Proper exterior cleaning is the foundation of any successful paint correction process.
Pro tip: Always use separate cleaning materials for different surfaces to prevent cross-contamination and potential scratching.
Step 3: Polish and correct paint surface defects
Polishing and correcting paint surface defects requires precision, patience, and the right techniques to restore your vehicle’s finish to its original pristine condition. This critical stage transforms your car’s appearance by systematically removing imperfections and creating a smooth reflective surface.
Automotive paint defect correction techniques demand careful assessment and strategic intervention. Begin by selecting the appropriate polishing pad and compound combination based on the severity of surface imperfections. Professional detailers recommend starting with the least aggressive method and progressively increasing cutting power only as needed.
Key polishing considerations include:
Identifying defect types such as swirl marks, scratches, and oxidation
Selecting correct polishing pad matching surface condition
Choosing appropriate compound for specific imperfection depth
Using proper machine technique with consistent pressure
Working in controlled sections to ensure uniform correction
Professional paint correction involves the following sequence:
Inspect surface under bright lighting
Select appropriate polishing pad
Choose matching compound
Begin with least aggressive method
Work in small 2x2 foot sections
Use consistent overlapping motions
Check progress frequently
Successful paint correction requires patience and methodical technique.
Pro tip: Always test your polishing method on a small inconspicuous area first to ensure desired results without causing additional damage.
Step 4: Refine paint finish for enhanced gloss
Enhancing your vehicle’s paint finish to achieve a stunning, mirror-like gloss requires meticulous technique and precision. This final refinement stage transforms a good paint correction into an exceptional, showroom-quality result that showcases your vehicle’s true potential.
Multi-stage automotive paint finishing involves carefully selecting specialized polishing compounds and techniques to create depth and clarity. Start by using an ultrafine polishing pad with a finishing compound designed to eliminate any remaining micro-scratches and maximize light reflection. The goal is to create a surface so smooth that it appears to have incredible depth and shine.
Key gloss enhancement strategies include:
Selecting the right finishing polish
Using microfiber buffing pads
Applying consistent, light pressure
Working in small, controlled sections
Checking reflection quality after each pass
Professional detailers recommend the following gloss refinement process:
This summary helps visualize the steps in the decontamination and polishing process:
Stage | Key Tools | Purpose |
Decontamination | Clay bar, iron remover, microfiber mitt | Remove embedded contaminants |
Initial Polish | Dual-action polisher, foam pad, compound | Eliminate moderate defects |
Gloss Refinement | Ultrafine pad, finishing polish | Enhance shine and smoothness |
Choose an ultrafine finishing polish
Select appropriate soft buffing pad
Work in 2x2 foot sections
Use slow, overlapping circular motions
Maintain even, light pressure
Inspect surface reflection after each section
Wipe with microfiber towel between passes
The difference between a good and exceptional finish is in the final refinement details.
Pro tip: Illuminate your work area with multiple light sources to accurately evaluate the paint’s reflectivity and ensure a truly flawless finish.
Step 5: Inspect results and ensure flawless appearance
The final stage of paint correction demands a meticulous and comprehensive visual assessment to guarantee an exceptional finish that meets the highest professional standards. This critical evaluation determines whether your extensive detailing efforts have truly transformed your vehicle’s paintwork.
Visual inspection techniques require precise lighting and careful examination to reveal even the most subtle imperfections. Begin by inspecting the vehicle in multiple lighting conditions - natural daylight, direct sunlight, and artificial workshop lighting - to ensure comprehensive evaluation of the paint’s reflectivity, depth, and clarity.
Key inspection criteria include:
Checking overall surface uniformity
Evaluating reflection clarity
Identifying any remaining micro-scratches
Assessing color depth and consistency
Verifying gloss level across entire surface
Professional detailers recommend the following inspection process:
Start in bright, natural daylight
Inspect from multiple viewing angles
Use LED inspection lights
Check surface in horizontal and vertical planes
Document any remaining imperfections
Photograph results for comparison
Consider professional third-party assessment
Perfection is found in the details that others might overlook.
Pro tip: Use a handheld LED light at a 45-degree angle to reveal subtle surface irregularities that might be invisible under standard lighting conditions.
Elevate Your Luxury Car’s Finish with Expert Paint Correction and Protection
Achieving a flawless paint finish requires more than just basic cleaning and polishing. The detailed process outlined in the article shows the importance of precise assessment, decontamination, and multi-stage polishing to eliminate swirl marks, scratches, and other imperfections. If you want to truly preserve and enhance your vehicle’s paint with professional-grade techniques, simply polishing is not enough. You need expert care combined with advanced protective solutions designed to maintain that showroom-quality gloss over time.
At Optyx Auto Studio, we specialize in premium paint correction services that mirror the careful and meticulous approach described. Our certified installers use top-tier products and precise application methods that minimize visible film edges and protect against future damage. Along with expert paint correction, we offer advanced options like ceramic coatings and paint protection film which shield your finish from environmental hazards and maintain that enhanced gloss longer. Don’t settle for less when it comes to your luxury car’s appearance. Visit Optyx Auto Studio today to schedule your consultation and experience a detailed-oriented, elite upgrade that truly transforms your vehicle.
Frequently Asked Questions
What is the first step in the luxury car paint correction process?
To start a luxury car paint correction process, thoroughly assess the paint condition and identify any imperfections. Clean the vehicle’s surface using a high-quality automotive wash solution before inspecting it under bright lighting to expose any flaws.
How should I clean and decontaminate my vehicle before correcting the paint?
Begin with a two-bucket washing method using pH-neutral automotive soap to remove dirt without scratching the paint. Follow this by using a clay bar and chemical decontaminants to eliminate any bonded contaminants and ensure a smooth surface.
What techniques are used for polishing and correcting paint defects?
Polishing involves selecting the right polishing pad and compound based on the defects’ severity. Start with the least aggressive method, work in small sections, and use consistent overlapping motions with the polisher to achieve uniform correction.
How can I enhance my vehicle’s paint finish for maximum gloss?
Enhance your vehicle’s paint finish by using an ultrafine polishing pad and a finishing compound designed to eliminate micro-scratches. Work carefully in small, controlled sections while applying light pressure until you achieve a deep, reflective gloss.
What should I look for when inspecting the results of paint correction?
During the inspection, evaluate the overall surface uniformity, reflection clarity, and gloss level from multiple angles and under different lighting conditions. Document any remaining imperfections to ensure that the paint correction meets professional standards.
How can I ensure that my luxury car paint correction process is flawless?
To achieve a flawless paint correction, pay attention to every detail and perform a thorough inspection after completing the polishing stages. Use a handheld light at a 45-degree angle to reveal hidden imperfections, ensuring that no detail is overlooked.
Recommended


Comments