
Role of Prep in Paint Correction: 25% Better Results
- optyxautostudio
- Mar 1
- 10 min read

Many car owners believe a simple wash prepares their vehicle for paint correction. This shortcut risks swirl marks and finish damage. Proper prep removes contaminants that polishing alone cannot address, forming the foundation for effective correction and lasting vehicle aesthetics. This guide reveals necessary prep steps, common misconceptions, and what Spokane car owners should expect for premium results.
Table of Contents
Key Takeaways
Point | Details |
Proper prep removes contaminants | Chemical decontamination eliminates embedded particles that polishing cannot address |
Skipping claying embeds dirt | Bonded contaminants cause permanent swirl marks when polished into clear coat |
Chemical prep boosts adhesion | Isopropyl alcohol wipes improve polish adhesion by up to 25% |
Professional prep saves time | Thorough surface cleaning reduces polishing time and rework by 25% |
Demand detailed processes | Premium results require washing, claying, chemical treatment, and thickness measurement |
Introduction to Paint Correction and the Role of Prep
Paint correction removes surface defects like swirls, scratches, and oxidation from automotive paint. The paint correction process restores clarity and gloss by carefully leveling the clear coat. However, correction effectiveness depends entirely on surface cleanliness before polishing begins.
Prep removes contaminants that polish cannot address. Dirt particles, industrial fallout, tree sap, road tar, and paint overspray bond to clear coat surfaces. Washing removes loose debris, but bonded contaminants remain invisible yet abrasive. Without proper removal, polishing drives these particles across the paint, creating new scratches instead of eliminating existing ones.
Surface preparation involves four essential steps: washing with pH-balanced automotive soap, clay bar treatment to extract bonded particles, chemical decontamination with isopropyl alcohol or panel prep solvents, and paint thickness measurement. Each step addresses specific contamination types that interfere with polishing effectiveness.
“Skipping or inadequately performing surface prep before paint correction risks polishing dirt and contaminants into the paint, causing swirl marks and scratches that degrade finish quality.” How to Do a Paint Correction Step-by-Step
Proper prep delivers multiple benefits:
Eliminates abrasive particles that cause new defects during polishing
Creates uniform surface texture for consistent polish action
Removes oils that reduce polish and coating adhesion
Enables accurate paint thickness readings to prevent over-polishing
Reduces total correction time by minimizing rework
Extends longevity of protective coatings applied after correction
You cannot achieve professional results by rushing this foundational phase. Every minute invested in thorough prep multiplies the effectiveness of subsequent polishing steps.
Detailed Paint Correction Prep Steps
Executing proper prep requires following a specific sequence. Missing steps or reversing order compromises results. Professional detailers follow this workflow for every paint correction project:
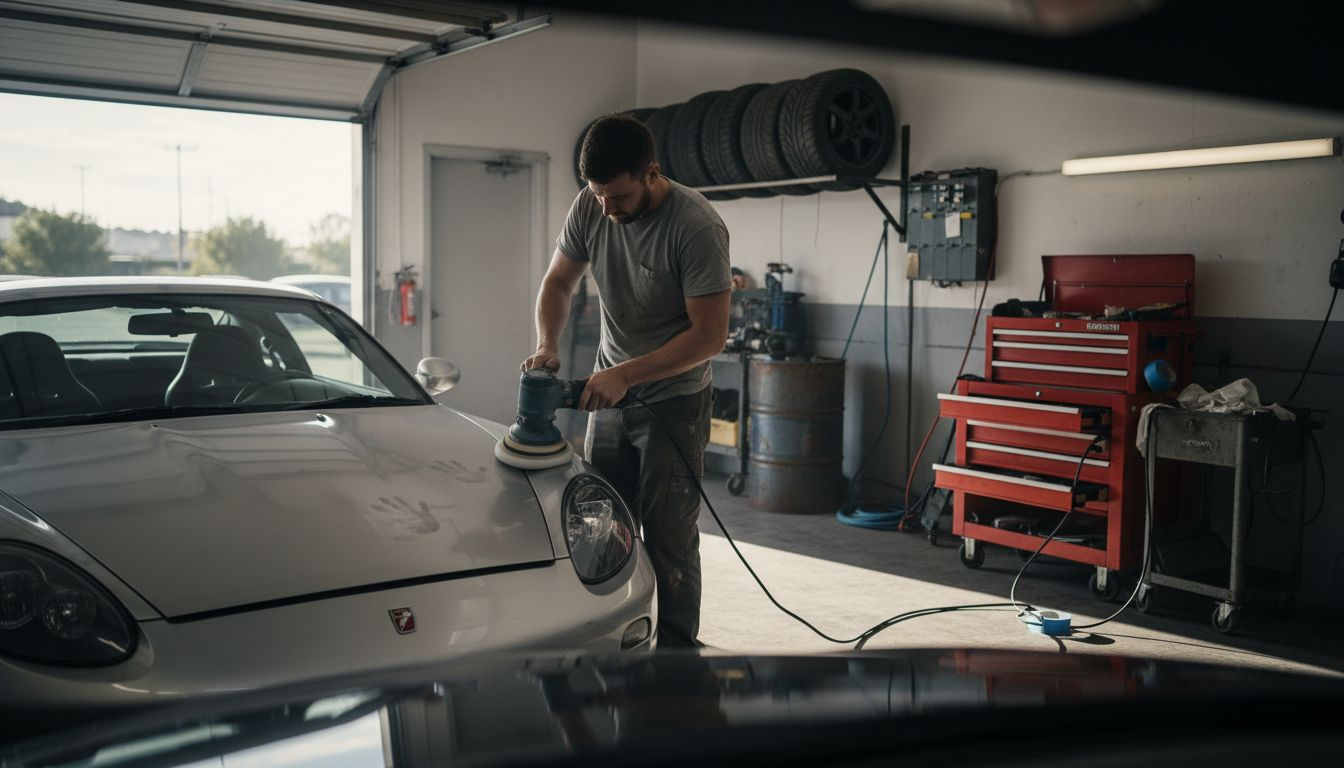
Thorough wash with automotive soap: Remove loose dirt, dust, and surface grime using pH-neutral soap and the two-bucket method. This prevents dragging particles during subsequent steps. Rinse completely to eliminate soap residue.
Clay bar or mitt treatment: Glide a lubricated clay bar across all painted surfaces to extract bonded contaminants. You’ll feel the surface transform from rough to glass-smooth. This mechanical process removes industrial fallout, rail dust, and overspray that washing cannot touch.
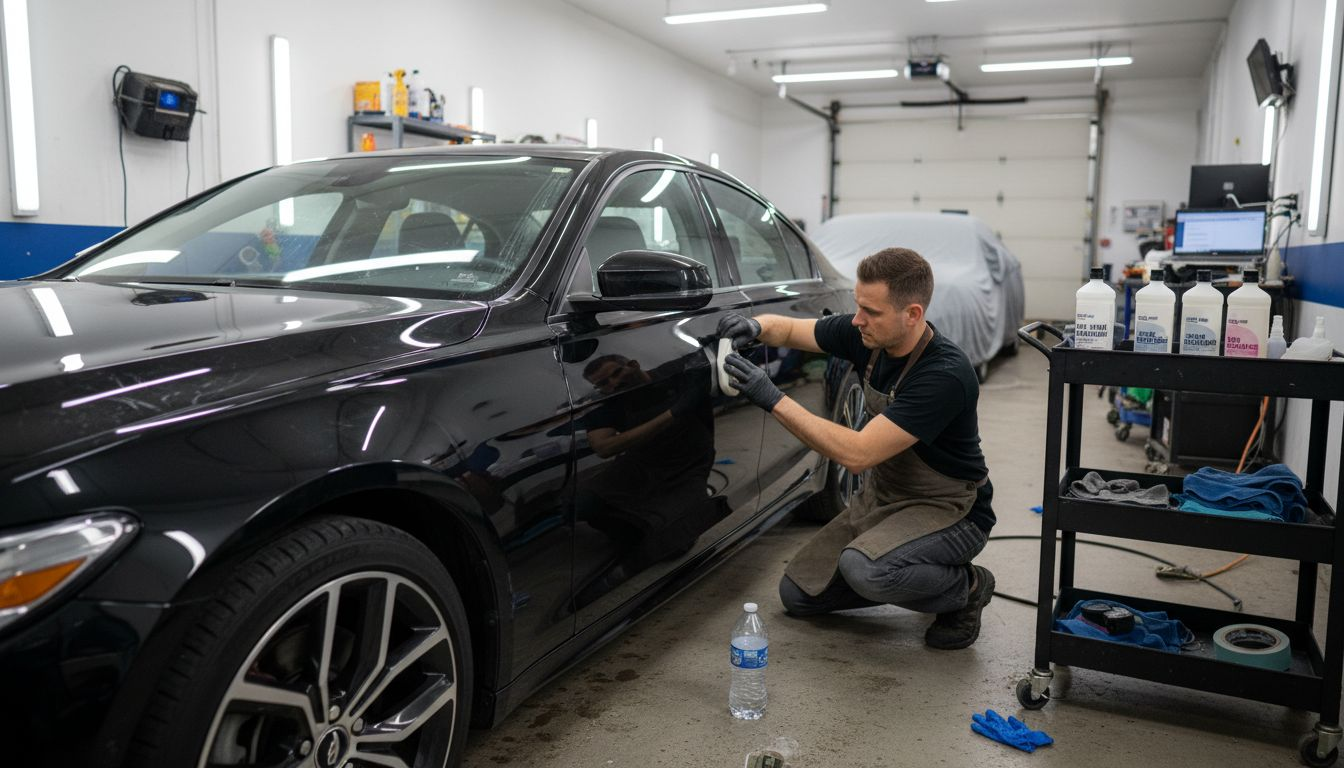
Chemical panel prep or IPA wipe: Apply isopropyl alcohol solution or dedicated panel prep solvent using a microfiber towel. This dissolves oils, waxes, and residues left by previous products. Chemical prep is mandatory even if paint looks clean, as invisible contamination blocks polish adhesion.
Paint thickness measurement: Use a digital gauge to measure clear coat depth at multiple points across each panel. Record readings to identify thin areas requiring gentle correction. This safeguards against burning through clear coat during polishing.
Each step serves a distinct purpose. Washing addresses loose debris. Claying extracts embedded particles. Chemical treatment eliminates molecular contamination. Measurement prevents irreversible damage. Paint correction detailed prep steps confirm this sequence as industry standard.
Pro Tip: Always measure paint thickness before polishing. Clear coat typically ranges from 40 to 80 microns. Areas below 60 microns require minimal correction to preserve sufficient protection. Document readings to track correction depth and maintain paint integrity over multiple services.
The paint correction checklist provides additional guidance on verifying each prep phase. You should literally feel the difference after claying, running your palm across the surface reveals glass-like smoothness that signals readiness for polishing.
Common Misconceptions About Prep in Paint Correction
Several myths about paint correction prep persist among car owners and even some inexperienced detailers. These misunderstandings lead to shortcuts that undermine results and durability.
Myth 1: Washing alone provides adequate prep. Regular car washing removes loose surface dirt but cannot extract bonded contaminants embedded in the clear coat. Industrial fallout and rail dust chemically bond to paint surfaces. These particles act like sandpaper during polishing, creating fresh swirl marks you’re trying to eliminate. Only mechanical clay treatment or chemical dissolution removes embedded contamination.
Myth 2: Prep is minor and can be rushed. Surface preparation typically consumes 30% of total paint correction time. Rushing through claying leaves embedded particles that increase polishing time and risk paint damage. Inadequate prep forces detailers to make multiple polishing passes, removing more clear coat than necessary and reducing paint protection.
Myth 3: Chemical prep is optional if paint looks clean. Oils and waxes create invisible barriers on paint surfaces. These residues prevent polish from bonding properly, reducing correction effectiveness by up to 25%. Even freshly washed paint contains microscopic contamination from water minerals and previous products. Chemical decontamination is mandatory for professional results, not optional.
Myth 4: All prep products work equally well. Different contaminants require specific removal methods. Clay bars excel at mechanical particle extraction. Isopropyl alcohol dissolves oils and waxes. Iron removers target metal particles. Using the wrong product or skipping certain treatments leaves contamination that interferes with polishing. Premium services layer multiple prep techniques.
These misconceptions explain why DIY correction often disappoints. You might polish for hours without achieving showroom results, frustrated by persistent haze or new swirl marks. The problem isn’t your polishing technique; it’s incomplete surface preparation.
Pro Tip: Always insist on claying and chemical decontamination even if your paint looks clean to the naked eye. Run your hand across the surface after washing. If you feel any roughness or bumps, bonded contaminants remain. Only glass-smooth texture indicates proper prep completion.
Understanding these paint correction misconceptions helps you evaluate service providers and verify thorough prep before polishing begins. Knowledge protects your investment.
Impact of Prep Quality on Paint Correction Results and Durability
Prep quality directly determines paint correction outcomes. Clean surfaces allow polish to work effectively, removing defects without introducing new scratches. Contaminated surfaces sabotage correction regardless of polish quality or technique expertise.
Detailers report up to 25% time savings in polishing phases with proper initial prep. This efficiency gain stems from three factors. First, clean surfaces require fewer polishing passes to achieve desired correction. Second, consistent surface texture allows uniform polish action across entire panels. Third, eliminated contamination prevents mid-process stops to re-clean and restart correction.
Durability improves dramatically with thorough prep. Protective coatings applied after correction bond at the molecular level when surfaces are chemically clean. Residual oils or contaminants create weak adhesion points where coatings fail prematurely. Proper chemical prep extends coating life by 30% compared to inadequate surface cleaning.
Benefits of comprehensive prep include:
Fewer surface defects after correction due to eliminated abrasive particles
Longer lasting polish results from improved coating adhesion
Reduced clear coat removal preserving paint thickness for future corrections
Decreased polishing compound consumption cutting material costs
Enhanced gloss and clarity from uniform surface preparation
Better protection against environmental contamination
The connection between prep and results is measurable. Paint correction results and durability studies show properly prepped surfaces maintain correction quality 40% longer than inadequately prepared paint. This longevity difference represents substantial value, extending time between correction services.
You invest significant money in professional paint correction. Demanding thorough prep ensures maximum return on that investment. The visible difference between adequate and exceptional prep appears in final gloss depth, defect elimination completeness, and how long results last before environmental contamination returns.
Comparison of Prep Techniques and Their Benefits
Different prep approaches deliver varying results. Understanding these differences helps you evaluate service quality and choose providers who employ professional techniques.
Prep Method | Contaminant Removal | Polish Adhesion | Finish Risk | Polish Usage | Swirl Risk |
Wash Only | Loose dirt only | Poor due to oils | High from embedded particles | 20% higher consumption | Very high |
Wash + Clay | Bonded particles removed | Moderate with residual oils | Medium without chemical clean | 15% higher | Medium |
Wash + Clay + Chemical | Complete removal | Excellent, 25% improvement | Minimal with clean surface | Optimized efficiency | Very low |

Chemical solvents like isopropyl alcohol play a critical role in prep effectiveness. Panel prep solvents can reduce polishing compound usage by 15 to 20% by enabling more efficient polish action on chemically clean surfaces. This efficiency translates to less clear coat removal and faster correction completion.
When each method makes sense:
Wash only: Never appropriate for paint correction, only for routine maintenance between details
Wash plus clay: Acceptable for light correction on newer vehicles with minimal contamination and no coating application planned
Wash plus clay plus chemical: Mandatory for professional correction, essential before any protective coating, required for optimal adhesion and durability
Professional detailers balance mechanical and chemical prep techniques. Clay bars provide physical contamination removal but can induce marring if used aggressively. Chemical solvents eliminate molecular contamination without mechanical abrasion risk. Combining both approaches delivers superior surface cleanliness while minimizing correction difficulty.
The prep techniques comparison shows that premium services always include full layered prep. You should never accept paint correction without chemical decontamination, regardless of paint condition appearance.
Pro Tip: Spokane car owners should insist on chemical prep using isopropyl alcohol or panel prep solvent to maximize polish adhesion and finish durability. This step costs little but dramatically improves correction quality and coating longevity. Ask your detailer specifically about their chemical prep process.
Practical Application: What Spokane Car Owners Should Expect and Demand
Translating technical knowledge into service selection requires asking the right questions and verifying thorough prep execution. Spokane car owners can ensure premium results by evaluating providers on specific criteria.
Key questions to ask detailers:
What specific washing method do you use and why?
Do you perform clay bar treatment on every paint correction?
Which chemical prep products do you apply and in what sequence?
Do you measure paint thickness before correction?
How do you verify surfaces are properly prepped before polishing?
Can you explain your prep workflow step by step?
Verifying prep completion requires both visual and tactile assessment. After washing and claying, run your palm across the paint surface. Properly prepped paint feels glass-smooth without any roughness or bumps. If you detect texture, bonded contaminants remain. Request additional clay treatment.
Chemical prep verification is straightforward. Ask your detailer to show you the IPA wipe or panel prep solvent they use. A clean white microfiber towel should show no discoloration after wiping chemically cleaned surfaces. Dirty towels indicate residual contamination requiring additional treatment.
Certified technicians follow standardized prep protocols and use quality products. Look for detailers trained by product manufacturers or industry organizations. Certification indicates knowledge of proper techniques and commitment to professional standards.
Steps to ensure top prep quality:
Request a detailed explanation of the prep process before service begins
Ask to inspect the vehicle after prep completion and before polishing starts
Verify clay treatment by checking surface smoothness yourself
Confirm chemical prep product usage and see the bottles
Request paint thickness measurements and documentation
Choose detailers who welcome questions and provide transparent answers
Pro Tip: Insist on seeing the prep workflow or get a personalized explanation from your service provider for transparency and confidence. Reputable detailers eagerly discuss their process and demonstrate techniques. Hesitation or vague answers signal potential shortcuts. Your vehicle deserves meticulous preparation, and premium paint correction expectations should include verifiable prep quality.
Spokane’s climate presents unique challenges. Road salt in winter and pollen in spring create persistent contamination requiring thorough prep. Local professionals understand these conditions and adjust techniques accordingly. Prioritize providers familiar with regional environmental factors affecting paint preparation.
Summary and Conclusion
Proper surface preparation forms the foundation of effective paint correction. Contaminant removal, polish adhesion improvement, defect prevention, and finish longevity all depend on thorough prep execution. Washing alone cannot achieve the surface cleanliness required for professional results.
Key prep steps include washing with automotive soap, clay bar treatment to extract bonded particles, chemical decontamination with IPA or panel prep solvents, and paint thickness measurement before polishing. Each step addresses specific contamination types that interfere with correction effectiveness.
Demand thorough prep and certified professionals when choosing paint correction services in Spokane. The 25% improvement in polish adhesion and time savings from proper prep justify insisting on complete workflows. Your vehicle’s finish quality and protection longevity depend on this foundational phase.
Essential lessons from this guide:
Washing removes only loose dirt, not bonded contaminants
Clay treatment mechanically extracts embedded particles
Chemical prep dissolves oils improving adhesion by 25%
Paint thickness measurement prevents over-polishing damage
Professional prep reduces correction time and improves durability
Spokane car owners should verify prep completion before polishing
Investing in proper preparation protects your vehicle and maximizes paint correction value. The difference between adequate and exceptional results lies in prep thoroughness, not just polishing skill.
Enhance Your Vehicle with Expert Paint Correction and Premium Protection
Optyx Auto Studio brings meticulous surface preparation and expert paint correction services to Spokane car owners who demand premium results. Our certified technicians follow comprehensive prep protocols including washing, claying, chemical decontamination, and thickness measurement before every correction project.

We complement paint correction with protective solutions that extend finish longevity. Advanced ceramic coatings bond at the molecular level to chemically clean surfaces, delivering years of protection and enhanced gloss. Paint protection film options shield vulnerable areas from rock chips and environmental damage. Experience the difference that thorough prep and professional expertise make. Contact us today to schedule your consultation and discover how proper preparation transforms paint correction results.
FAQ
What happens if surface prep is skipped or rushed before paint correction?
Skipping prep embeds dirt and contaminants into the clear coat during polishing, causing new swirl marks and scratches that degrade finish quality. Inadequate surface prep risks polishing abrasive particles across paint, creating defects instead of eliminating them. Rushed prep leaves bonded contamination that increases polishing time and reduces correction effectiveness.
How do chemical prep products improve paint correction outcomes?
Chemical prep removes invisible oils, waxes, and residues that washing cannot eliminate. Isopropyl alcohol and panel prep solvents improve polish and coating adhesion significantly, with adhesion improvements reaching 25%. This enhanced bonding extends correction longevity and reduces polish consumption by enabling more efficient compound action on clean surfaces.
What should Spokane car owners ask their detailer about prep?
Ask about clay bar treatment frequency, chemical prep product types, and paint thickness measurement protocols. Request a step-by-step explanation of the prep workflow and verification methods used to confirm surface cleanliness before polishing begins. This checklist for prep verification helps ensure thorough preparation and professional service quality.
How long does proper paint correction prep take?
Proper prep typically requires 30% of total paint correction time, usually 1 to 2 hours for average vehicles depending on contamination levels. Thorough washing takes 30 minutes, clay treatment requires 45 to 60 minutes, and chemical decontamination adds 15 to 20 minutes. Paint thickness measurement takes an additional 10 to 15 minutes. Rushing through prep saves minimal time while significantly compromising correction quality and durability.
Recommended


Comments